
Cascadeur / Character animation / AI-assisted animation / Houdini workflows
From a Rigged Character to a Crowd: Animating in Cascadeur and Finishing in Houdini
Build a walk, explore gait through endpoint spacing, create four run takes, and put those performances on steerable Houdini crowd agents.
Written guide
Playing loads YouTube content. YouTube processes data after activation.
Watch on YouTubeIf the player is blocked or unavailable, use Watch on YouTube.
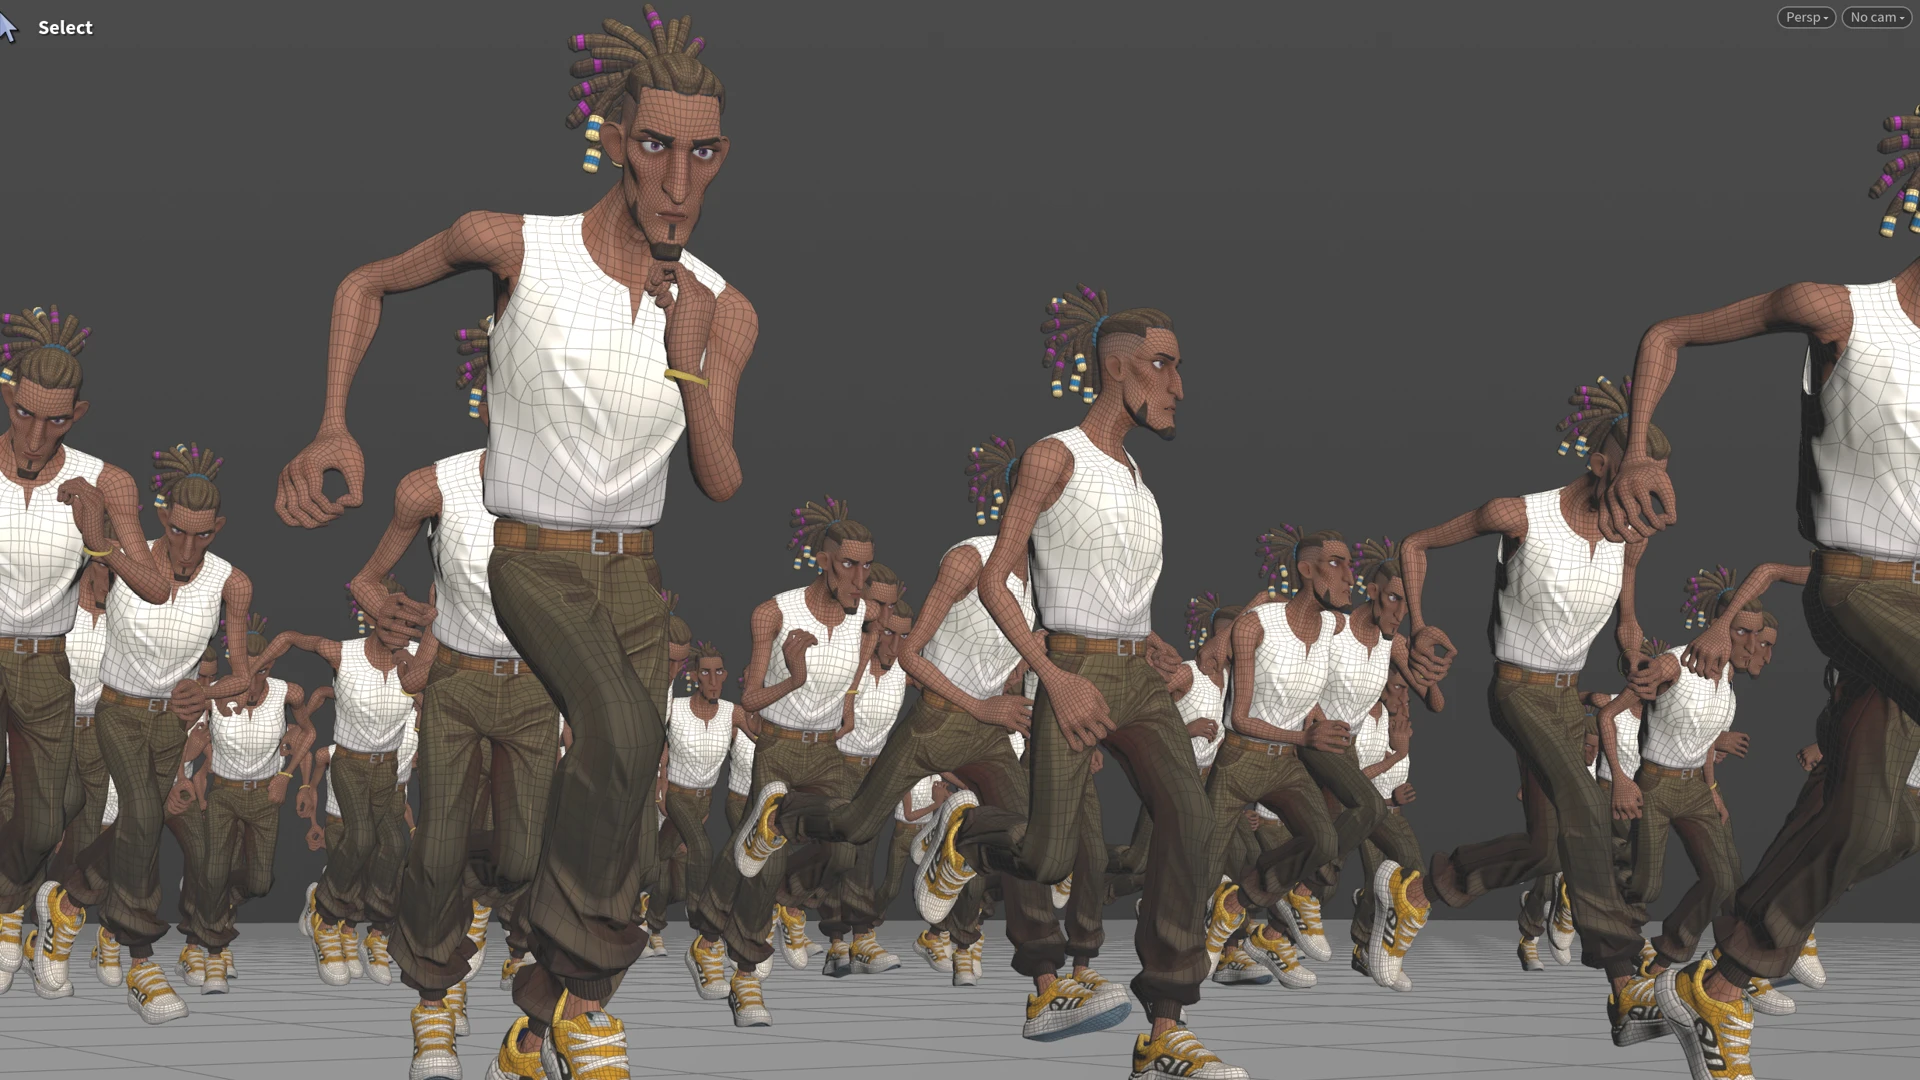
I wanted several performances for a crowd shot without posing every step four times. I started with one rigged character, tested how far I could move a pair of poses in Cascadeur, then kept four runs that I could play on the same Houdini agent. The useful part came later. I could move a box in Houdini, change the runners’ paths, and keep the performances I’d chosen.
Cascadeur relationship disclosure: Cascadeur provided complimentary Pro access for this evaluation. I may earn a commission if you buy through my Cascadeur referral link (affiliate link).
Workflow video
The film goes from the first walk through all four run takes and ends with the original crowd flipbook. The walkthrough below can be followed independently.
Watch the complete film in the player above, or follow the written steps and source-frame checkpoints below.
Before opening the character
You need a skinned humanoid with its skeleton, the matching textures, and a rig you can use throughout the exchange. Keep a character FBX for geometry and separate files for the motion you will make. Using the same skeleton for both sides removes a retargeting step from this exercise.
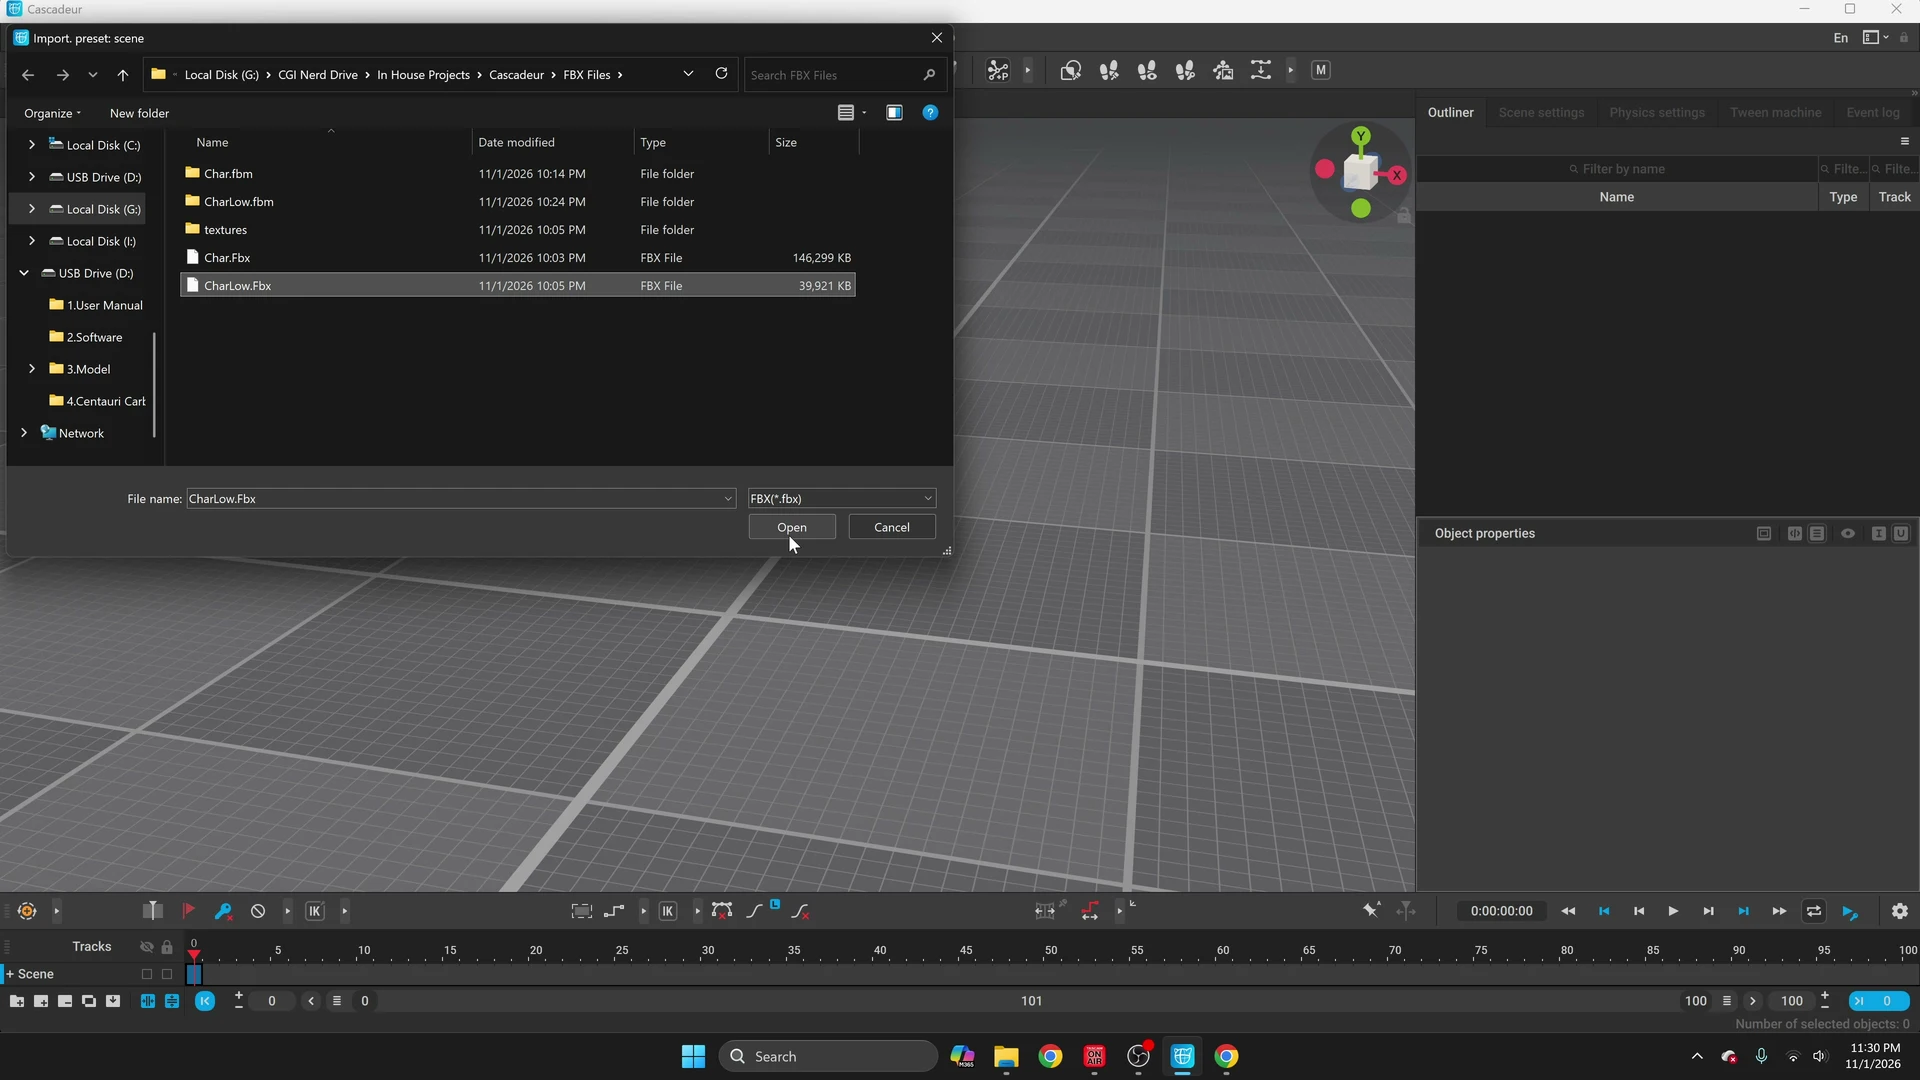
In this project, CharLow.Fbx was the working character. Char.Fbx was a larger alternative set aside for a possible render pass. The November captures start at the FBX handoff. If you are preparing your own character in Character Creator 5, open File → Export → FBX → Clothed Character. The manual offers a Mesh export for a character without an appended motion. Keep the skinned character and skeleton together, retain texture references, and test the exported asset before making multiple takes. The exact Character Creator preset and reduction settings from my session are unrecorded. Character Creator 5 export reference
| Clock or version | What it describes |
|---|---|
| Cascadeur 2026.2.3.0.16863 | Installed executable checked for this pass. The saved scenes record centimeter units and 30 fps. |
| Character Creator 5.20.2228.1 | Installed executable. The source FBX sidecars name Char and CharLow. The export dialog itself was not captured. |
| Houdini Indie 22.0.466 | Recorded title bar and installed runtime. The on-screen test was an untitled scene. |
| Frames 0 through 100 | Cascadeur’s saved working interval. The first and last poses are 100 frame intervals apart. |
| 24 fps, 100 frames | The separate, finished 1280 × 720 Houdini flipbook plays for 4.167 seconds. OBS captured the software interface at nominal 60 fps. |
Import the character and build the posing rig
- In Cascadeur, choose File → Import → FBX and the whole-scene import. Select CharLow.Fbx. Give the import time to finish before interpreting an empty viewport.
- When Rig Mode Helper asks whether to enter rig mode to rig the imported model, click Yes. Accept the prompt to launch the Quick Rigging Tool for a human character.
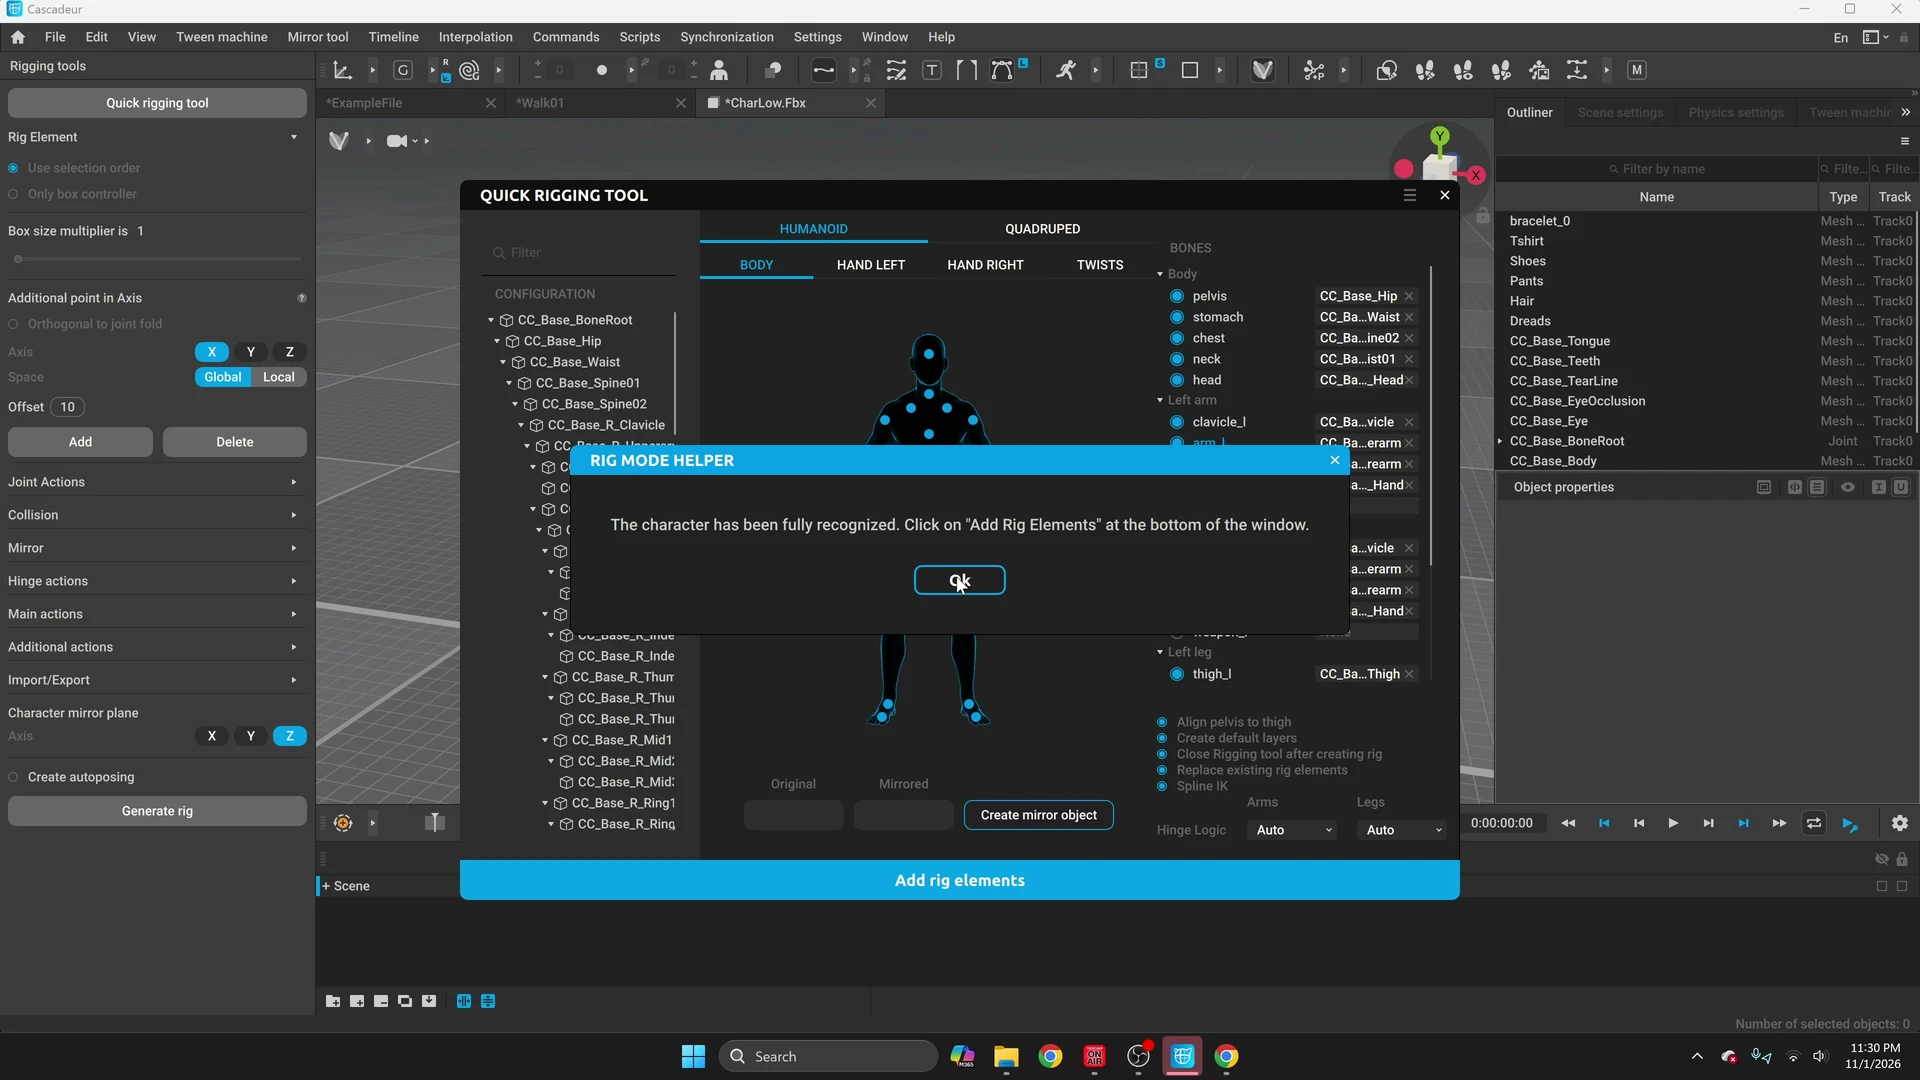
- Inspect the humanoid mapping. On this skeleton the helper explicitly reports successful recognition. If your mapping is incomplete, resolve the unmapped elements before generating the rig. The Quick Rigging reference explains the manual mapping path.
- Click OK, then Add rig elements. When the helper offers to generate the rig, choose Generate rig. Check for the posing controls on the body and feet. Save a rigged starting scene. The corresponding save here is CharacterImport.casc. Cascadeur Quick Rigging Tool
Build the first walk from two keys
Start at frame 0 with the character’s initial pose. Go to frame 100. Hold Shift while clicking the two foot controllers, then add the pelvis controller. Create the end key with F. A blue tick appears at the far end of the timeline. I initially tried translating the controls before making the key and watched the character pop back. The timeline tick is the practical checkpoint.
Move the selected controls forward on the floor at frame 100. Scrub back and forth. In Step interpolation the character holds the earlier pose until the next key. That lets you see the actual endpoints before generating the travel between them.
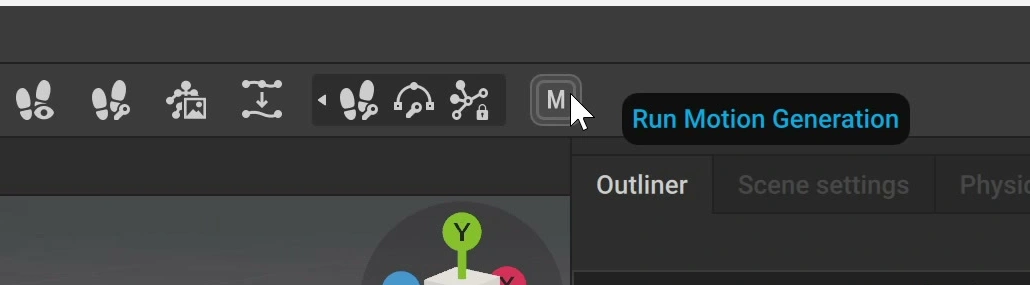
Drag to select the interval from 0 to 100. Click Run Motion Generation on the toolbar, identified by the M icon. Let the calculation finish. Look for the changed timeline and, while a control is selected, its trajectory. Switch from AutoPosing to View mode and play the interval. At this spacing the character walks. The word “Run” in the button label starts the operation. Its name does not specify the gait. Cascadeur Motion Generation
Change the gait by changing the distance
Keep the same 0–100 interval. Return to AutoPosing at the end key and move that pose farther away. After generation, more of the character can be keyed. In this recording I had to include the hands and head as well as both feet and the pelvis to move the whole pose together. If the torso bends away from a stranded hand or head, inspect the controller selection before recalculating.
Run Motion Generation again and play the result. The character now has farther to go in the same time. The take first reads as a shuffle, then as a faster run when the end moves farther away. You can reproduce the comparison without copying a particular world-space translation. Keep the time span fixed, increase the distance incrementally, and inspect each playback.
I also pushed it beyond the useful range. The middle still looked like a run, but the beginning and end jumped. Judge those transitions separately. Pull the end pose closer or allow more frames if the shot needs time to accelerate and settle. The saved walk and the distance experiments establish the method. The crowd’s four named clips come from the following run session.
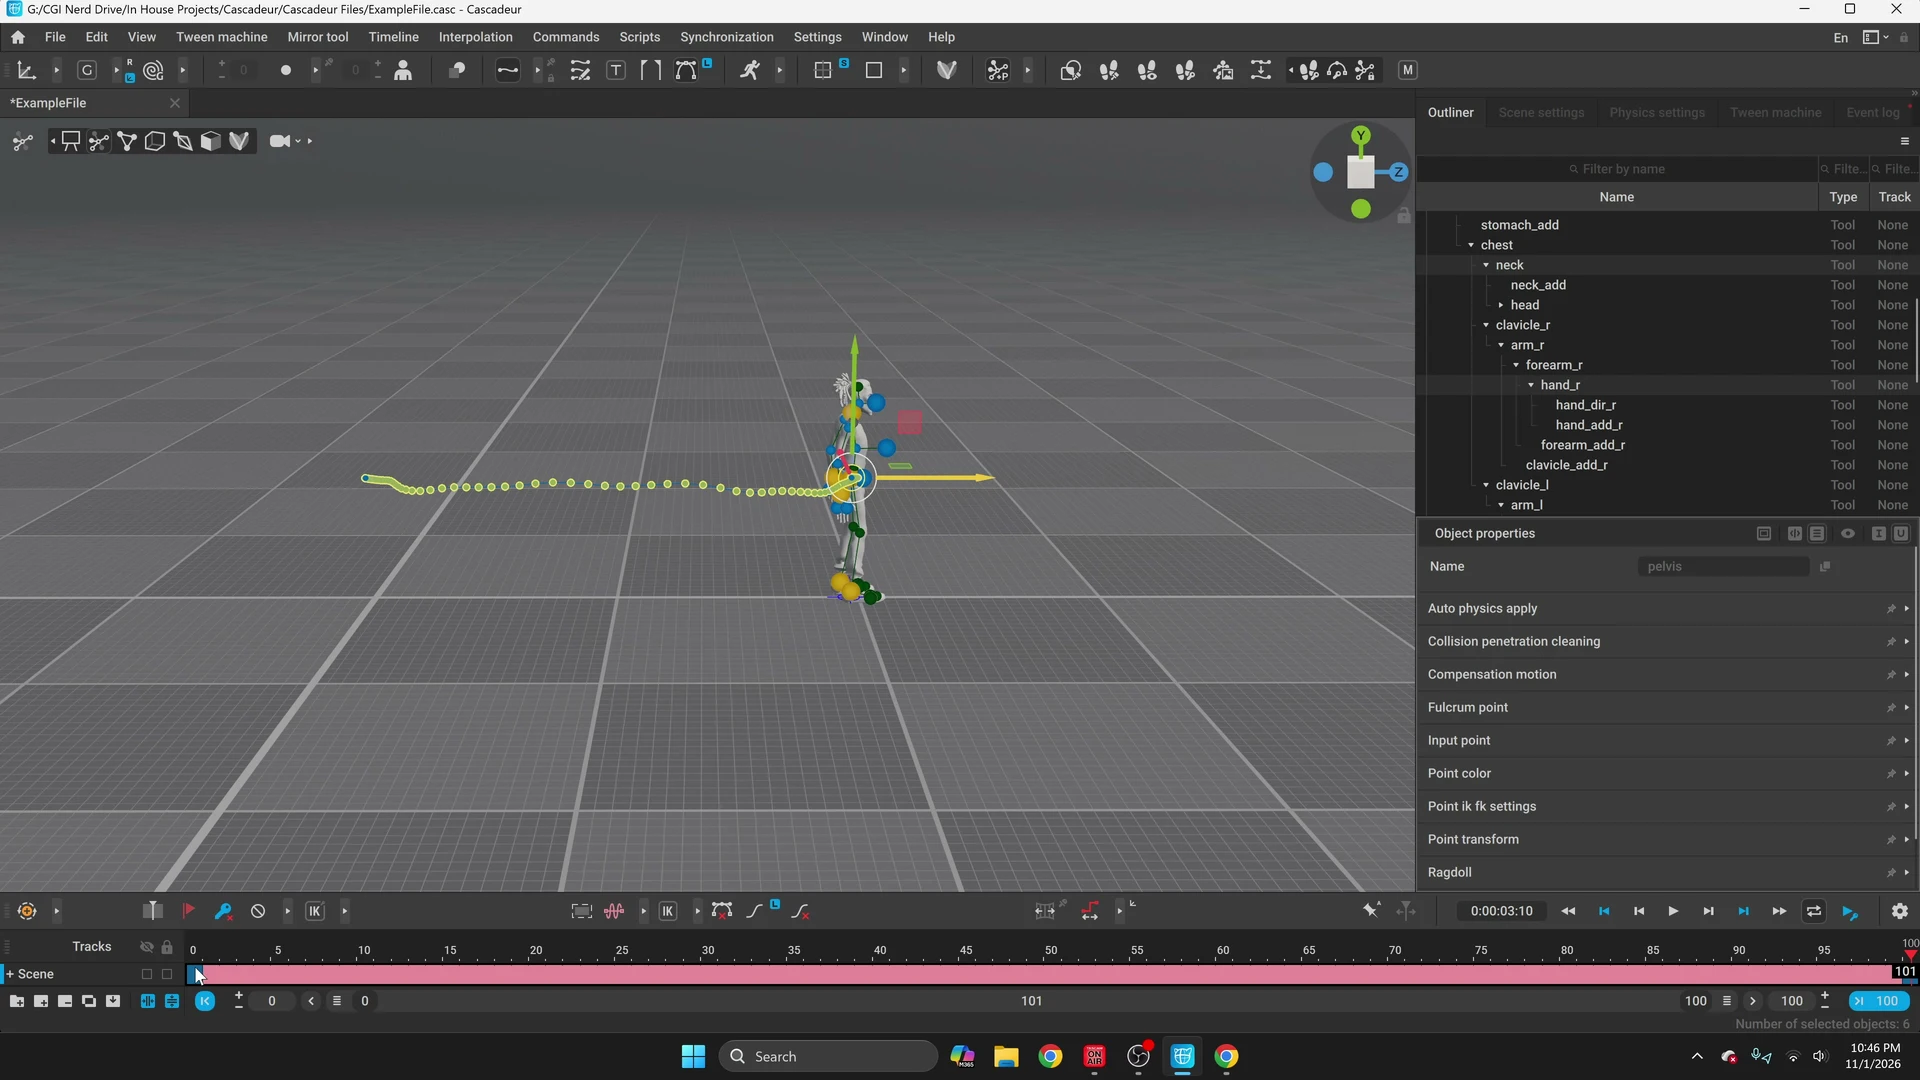
Run01 — direct the pose, then compare two ways to fill the interval
For the first run, build a deliberate silhouette in AutoPosing. Place the legs in a stride, adjust the hips, bring the head forward, and shape the hands with Pose Tools. Orbit the viewport. An elbow can read clearly from the side and still pass through the body from the front. AutoPosing lets selected controls guide a full-body pose. Your hand, foot and head choices still determine the pose you are asking it to solve. Cascadeur AutoPosing
Set the end key at frame 100 with F, translate the end pose, and select the interval. First try Inbetweening and inspect it in View mode. In this recording the opening movement felt awkward. I then tried Motion Generation and compared the result in playback. Inbetweening is designed to fill between keyed poses. Motion Generation also considers the trajectory and can vary the pose more. The distinction matters when a particular silhouette must survive the pass. Inbetweening · Motion Generation
The generated take looked as if the character almost tripped and then kept going. That gave him a reason to move the way he did. I kept that performance as Run01. The working scene in the recording still carries an earlier Walk02 name before the run files are named consistently. Use the saved scene and export names for the handoff.
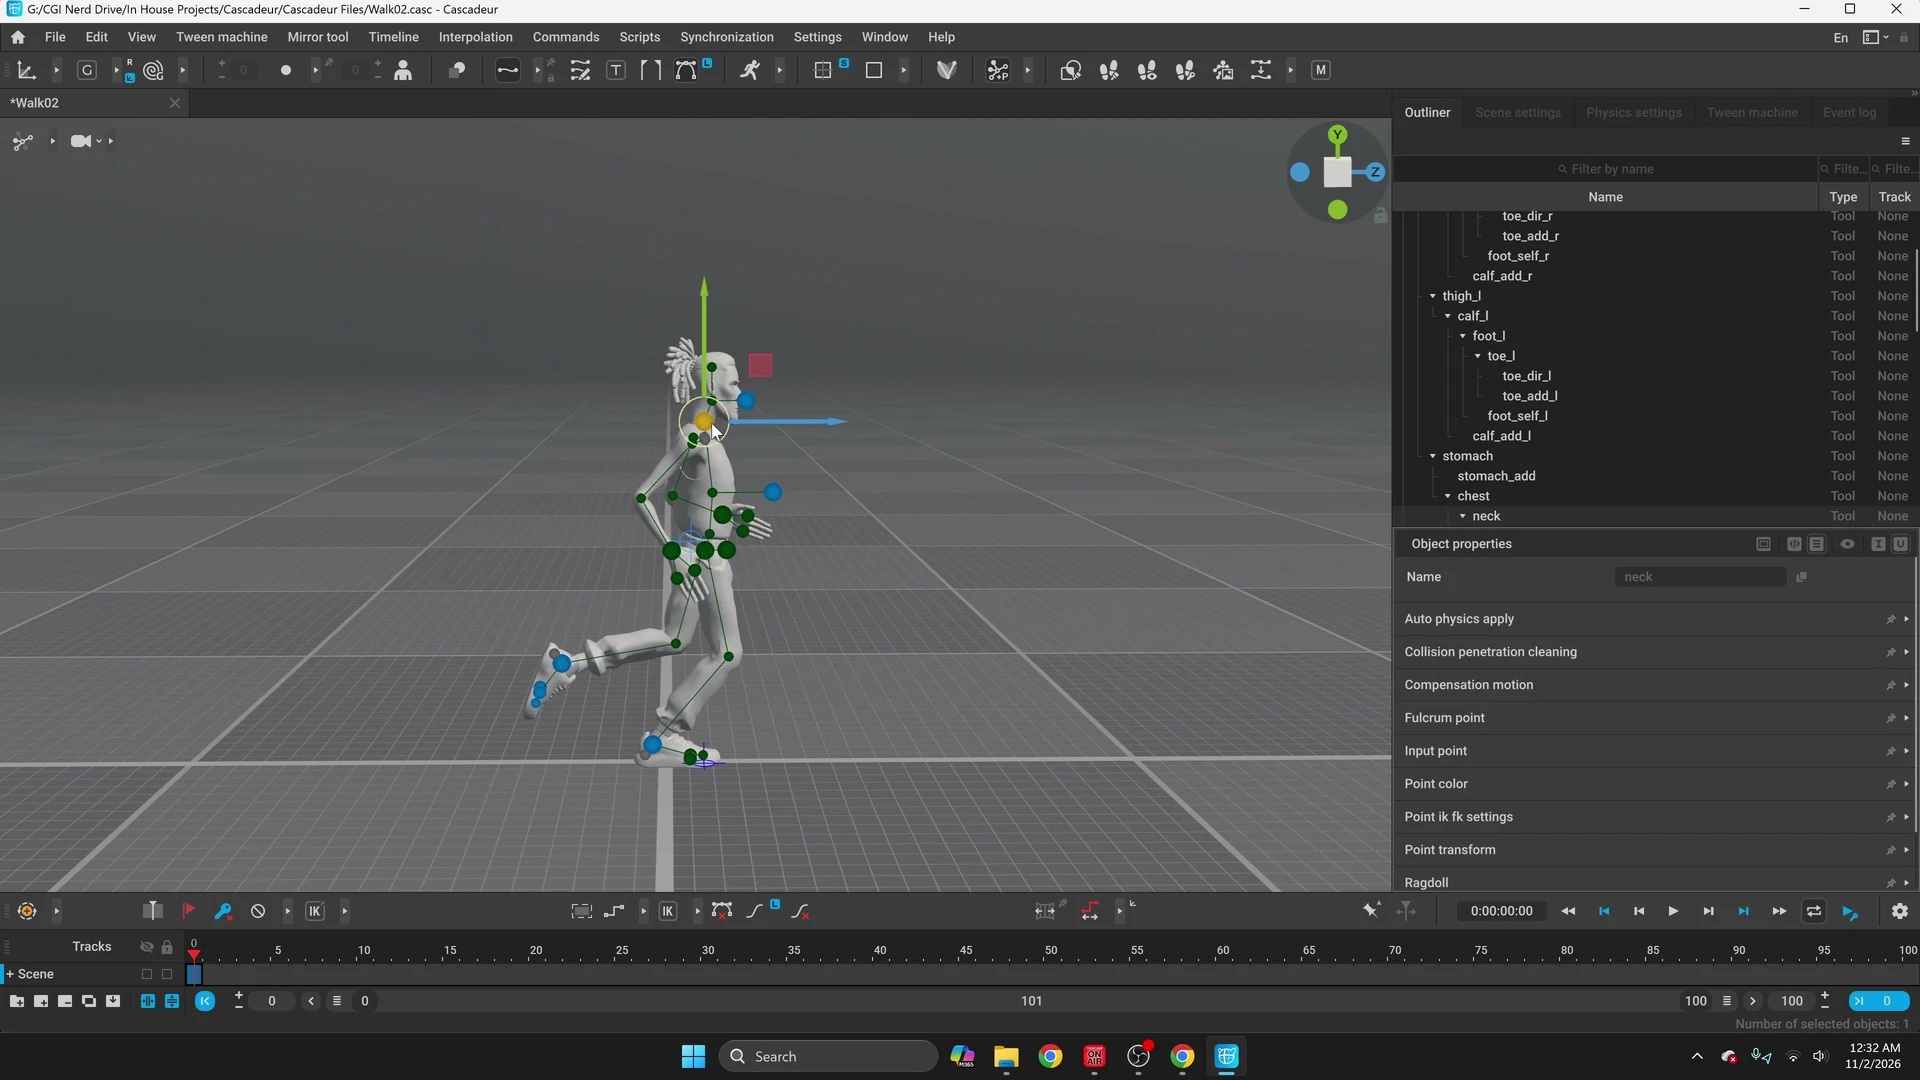
Run02 — generate another performance from the same endpoints
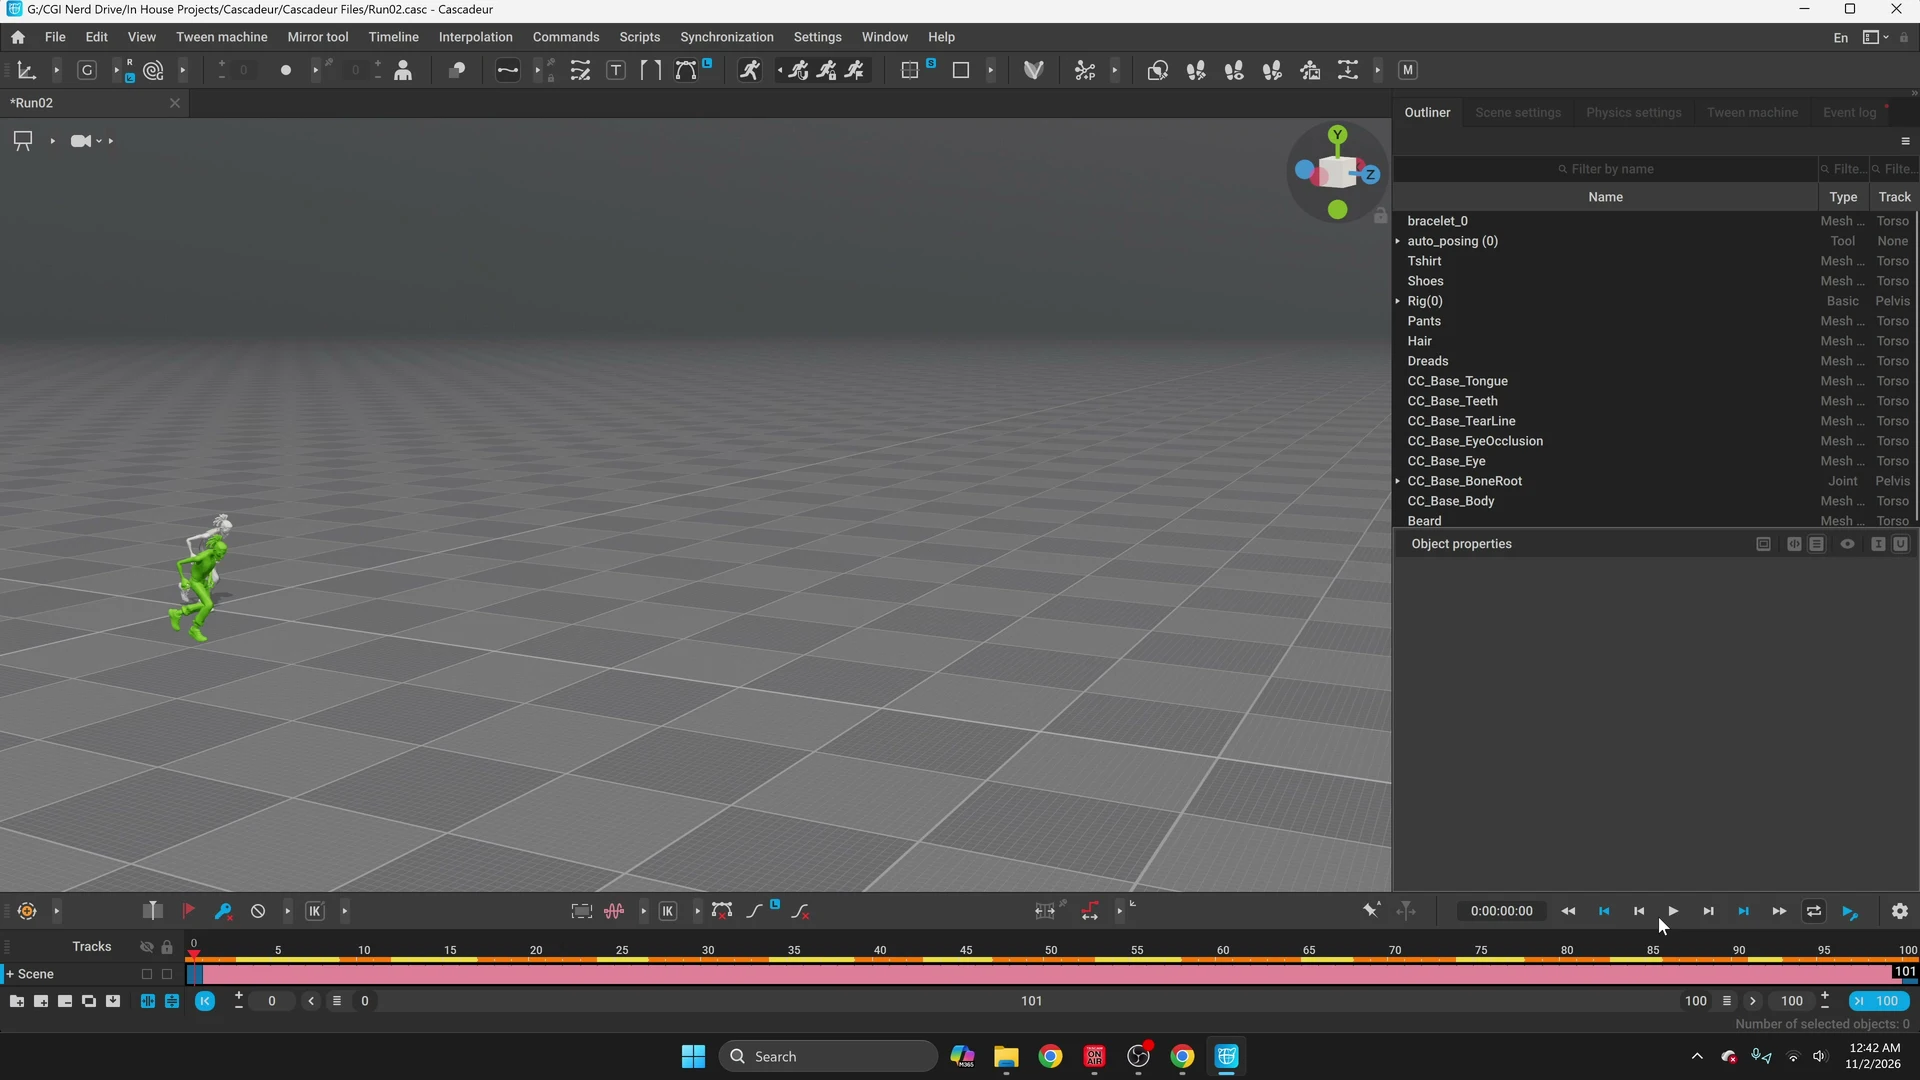
Keep the beginning and end poses and reselect the full interval. Run Motion Generation again. Watch the candidate before saving. The spacing and character are already established, so the new decision is whether this performance belongs beside the first one. Use Save As to preserve the prior take and store this one as Run02.casc. The recorded naming discussion begins around Run 06:24.
Compare from a common angle if the changes are subtle. A different camera or a different playback phase can make identical motion appear more varied than it is. The review film includes a new comparison using the actual exported clips on CharLow at matched times.
Run03 — keep a variation, then test the limits of regeneration
Generate another candidate over the bounded interval and save the one you like as Run03.casc. Compare the feet and arms to the poses you meant to keep. In this session successive passes changed some keyed poses. Trying a smaller selection without including the necessary keys also produced a warning. Select an interval bounded by keys before retrying.
Repeated regeneration eventually gave me an arm passing into the torso. Turning on the physics suggestion helped part of that motion, but the overlap remained visible. Keep the accepted third take separate from the later rejected experiments. This is why a new filename for each keeper is worth the extra step.
Run04 — make a fresh branch and test a physics correction
Reopen Run02 and generate from the full interval again. Play the fresh candidate. Turn on the Physics Assistant. Compare the green proposal against the current character through the step, especially at contact and when the torso changes direction. The green comparison is a candidate you can inspect before applying it. Cascadeur AutoPhysics
For the version I preferred, I used the operation to snap to physics on all frames, played the result and saved Run04.casc. Recheck the arms after applying a physics pass. The recording contains a visible example of an intersection surviving an earlier attempt.
| Performance | What distinguishes it | Handoff |
|---|---|---|
| Walk and distance trials | Same time range, changing endpoint spacing. Walk, shuffle, faster run, then an overextended test. | Instructional foundation. No walk-named clip appears in the recorded crowd list. |
| Run01 | Hand-posed stride, inbetweening test, generated stumble and recovery. | Char_run_01.fbx → run01 |
| Run02 | Fresh generation from the same intended beginning and end poses. | Char_run_02.fbx → run02 |
| Run03 | Another accepted variation before further regeneration produced weaker trials. | Char_run_03.fbx → run03 |
| Run04 | New pass branched from Run02 and compared against the Physics Assistant. | Char_run_04.fbx → run04 |
Compare one frame before you pick a take
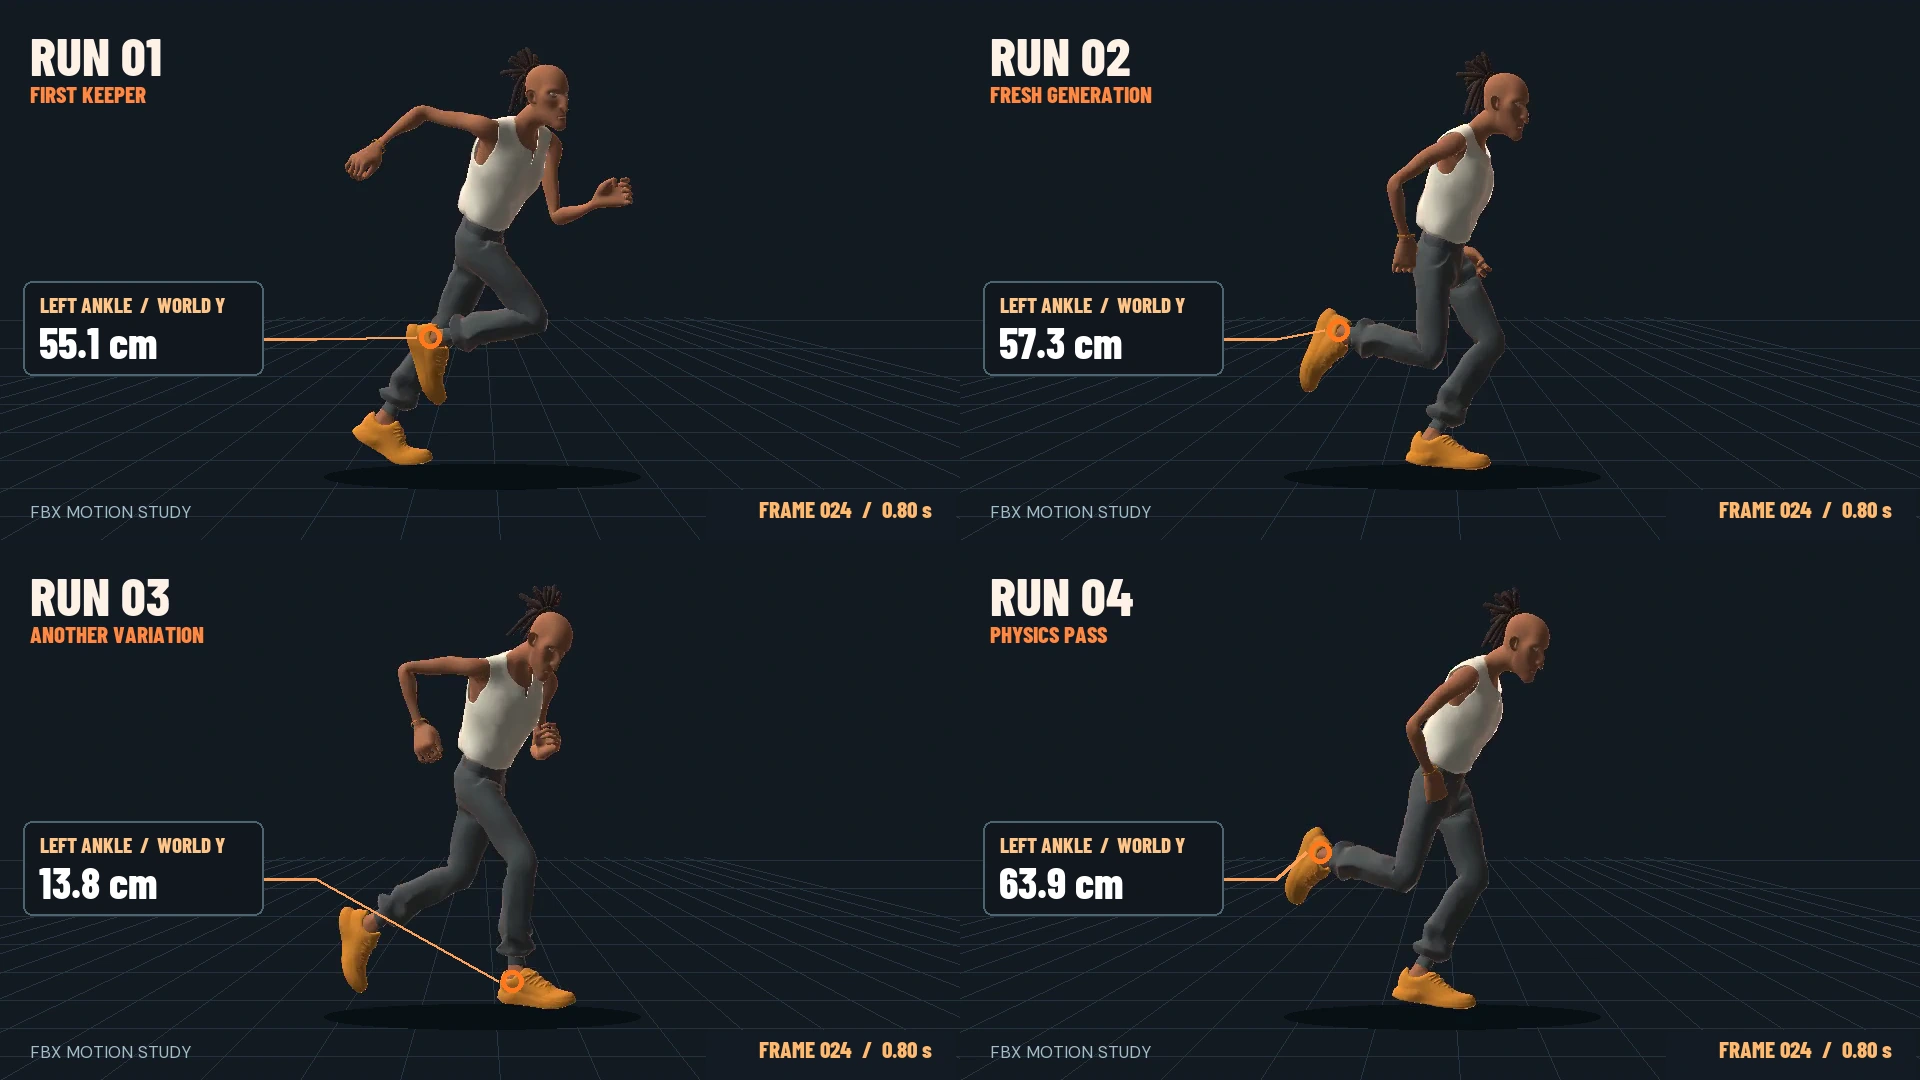
At source frame 24, 0.80 seconds into each exported take, the left ankle joint is 57.3 cm above the scene origin in Run02 and 13.8 cm in Run03. Run01 measures 55.1 cm and Run04 measures 63.9 cm. These are world-space heights of the same joint, CC_Base_L_Foot. Sole clearance is a separate measurement. The difference makes the timing of the leg swing visible even though the runs cover nearly the same distance.
Export a motion file for each run
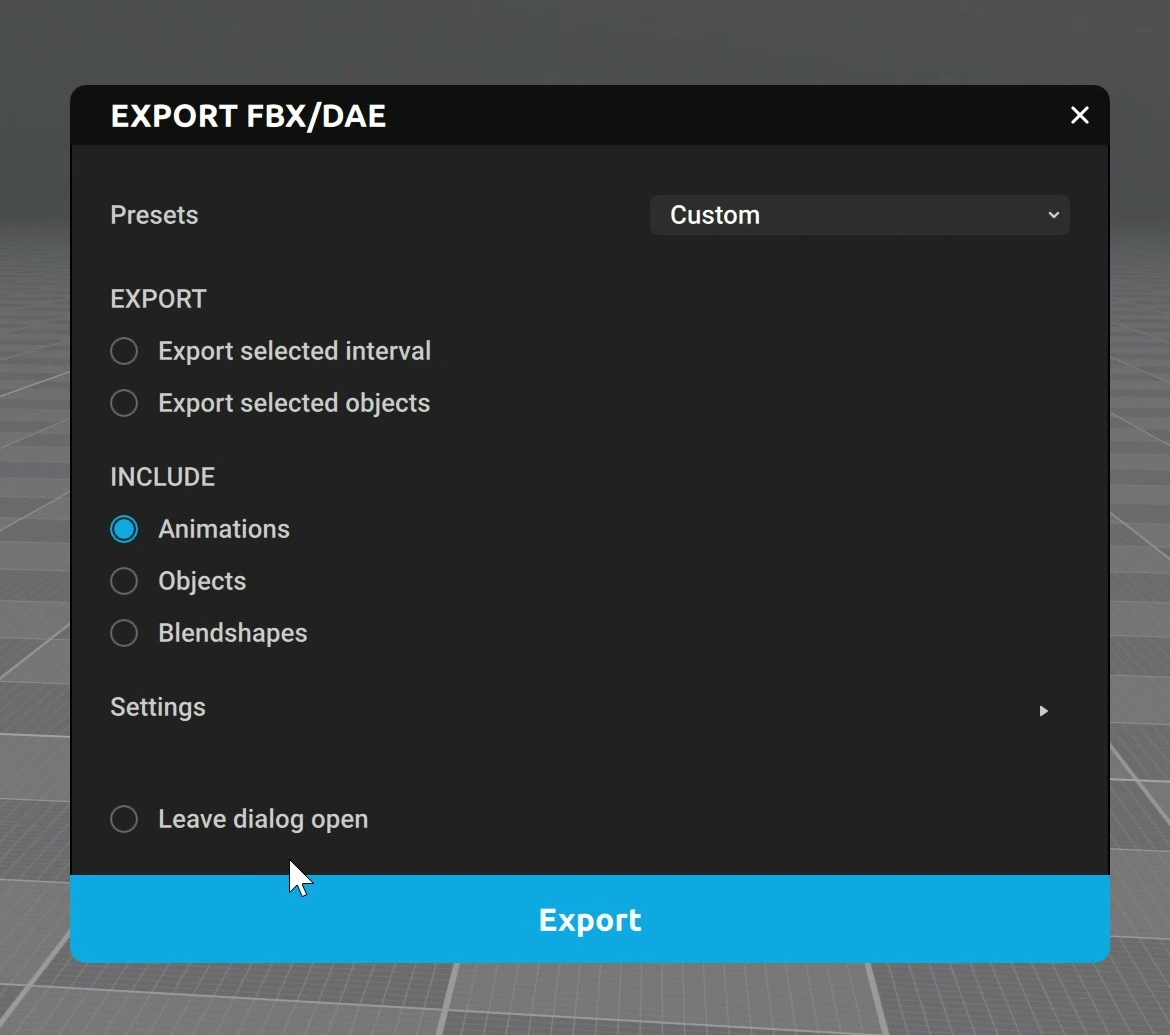
Open a saved run, choose File → Export → FBX and inspect the Include controls. Leave Animations on and turn Objects and Blendshapes off. In the recording the dialog changes from the Scene preset to Custom. Save the first file as Char_run_01.fbx. Repeat with the three other saved scenes and the matching numbered filenames. The first dialog and save are recorded. The four output files independently confirm one named animation stack per file with animation curves and no FBX Geometry object.
Test one Houdini agent
- In a Geometry object, create FBX Character Import and load CharLow.Fbx. Display the character. Here a Color SOP set point color to white for the viewport, and Clean removed loose points beneath the geometry. Use those fixes if your inspection reveals the same issues.
- Feed the character rig into Agent from Rig. Give Agent Layer the agent on its first input and the character geometry on the second. Display the layer and check the default character.
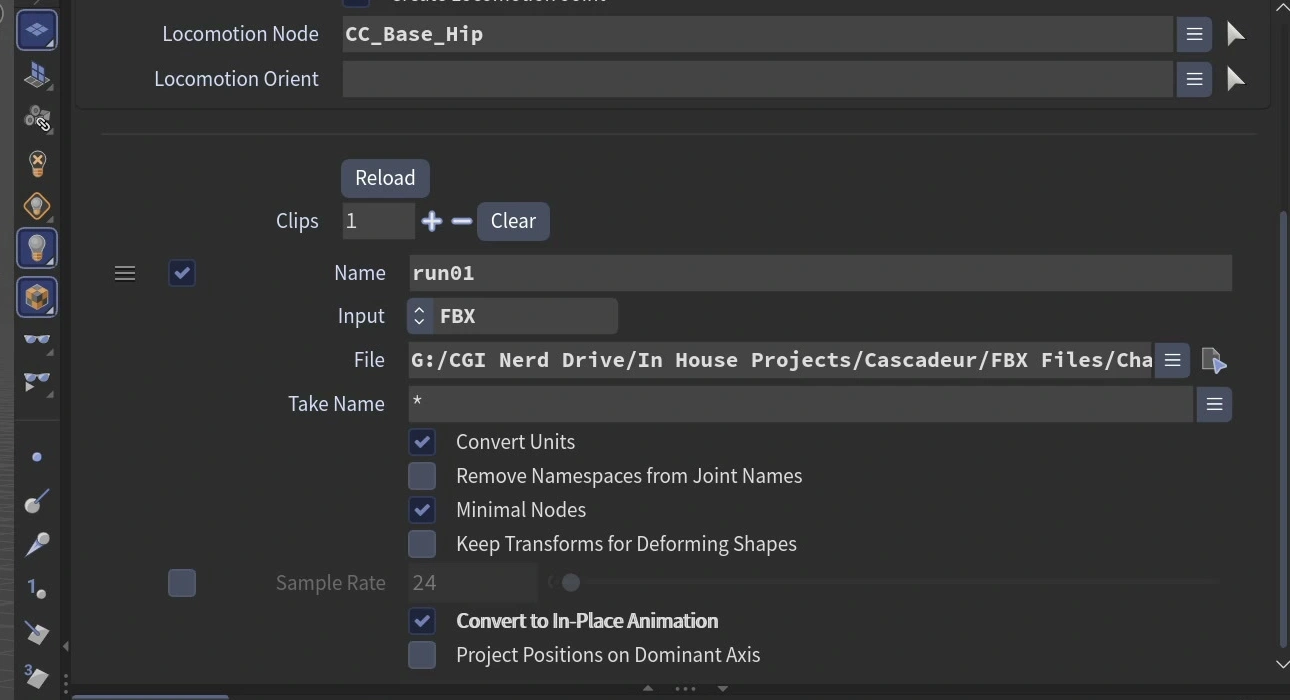
- Add Agent Clip. Choose FBX as the clip input, load Char_run_01.fbx, and name the clip run01. Set that name as the current preview clip. Enable real-time playback so a fast viewport does not change your judgment of the gait.
- Watch the ring and the runner at the loop boundary. The first preview reset and the body later appeared to travel away from its guide. The recorded working run01 test uses CC_Base_Hip as the locomotion node and enables Convert to In-Place Animation. Apply Clip Locomotion is a separate preview control. With the conversion active, toggle the preview option off and verify that the body stays in place while the legs cycle.
- Add the remaining three named FBXs. Preview run02, run03 and run04 individually. In the later run02 test both Locomotion Node and Locomotion Orient read CC_Base_Hip. These are values from this rig and recorded state. Identify the joint carrying travel in your own skeleton before copying those fields. SideFX Agent Clip
Place, steer and inspect the crowd
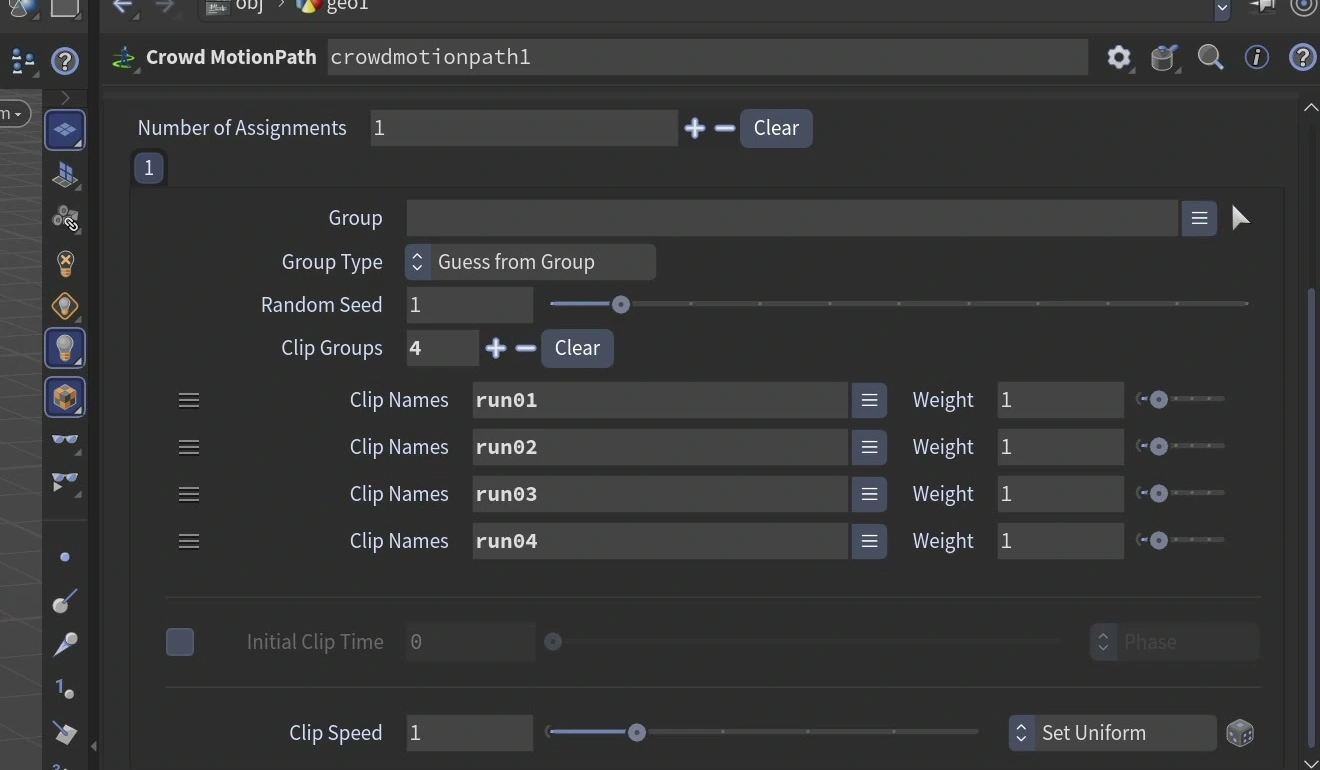
Connect the agent to the first input of Crowd Source. Start with a small count and a scatter seed that lets you see individual actors. Downstream, add Crowd Motion Path. In its animation assignment add four clip groups and set their clip names to run01, run02, run03 and run04. The recorded panel shows four entries, each with weight 1. Play the paths and look for different gait phases. Set up Randomize Clip Time on Crowd Source to offset repeated starts. Widen the range gradually and recheck in playback. SideFX SOP motion paths
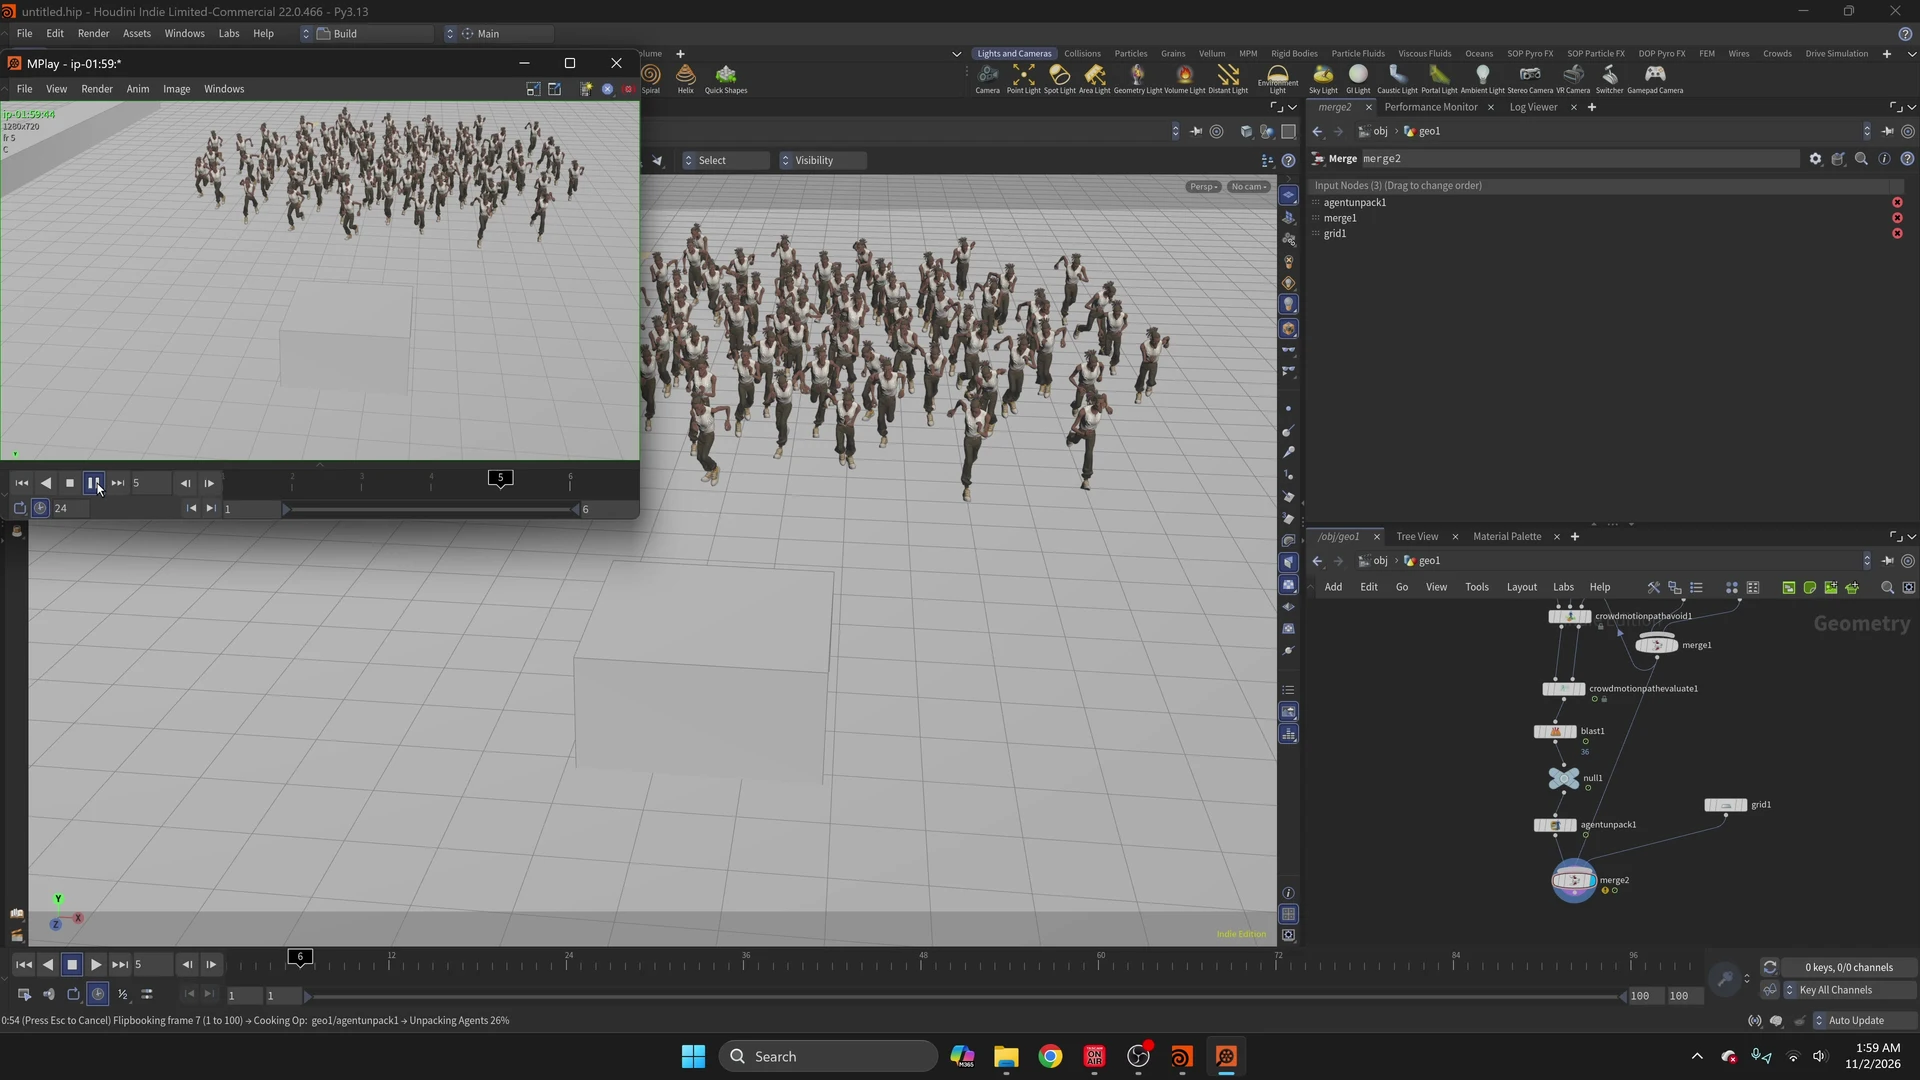
If you have paths but the expected downstream agent geometry is missing, add Crowd Motion Path Evaluate before Agent Unpack. The evaluation samples the agents along their paths at the current time. Leave the lighter path view on while adjusting the crowd if unpacking makes playback sluggish.
Add Crowd Motion Path Avoid before the evaluation step, connect the path stream, and feed a box into the obstacle input. Display the box as a guide while you move it. You should see the path curves bend while the assigned run clips stay in use. A second box was merged into the obstacle setup in this shot. The visible steering comes from a SOP motion-path workflow.
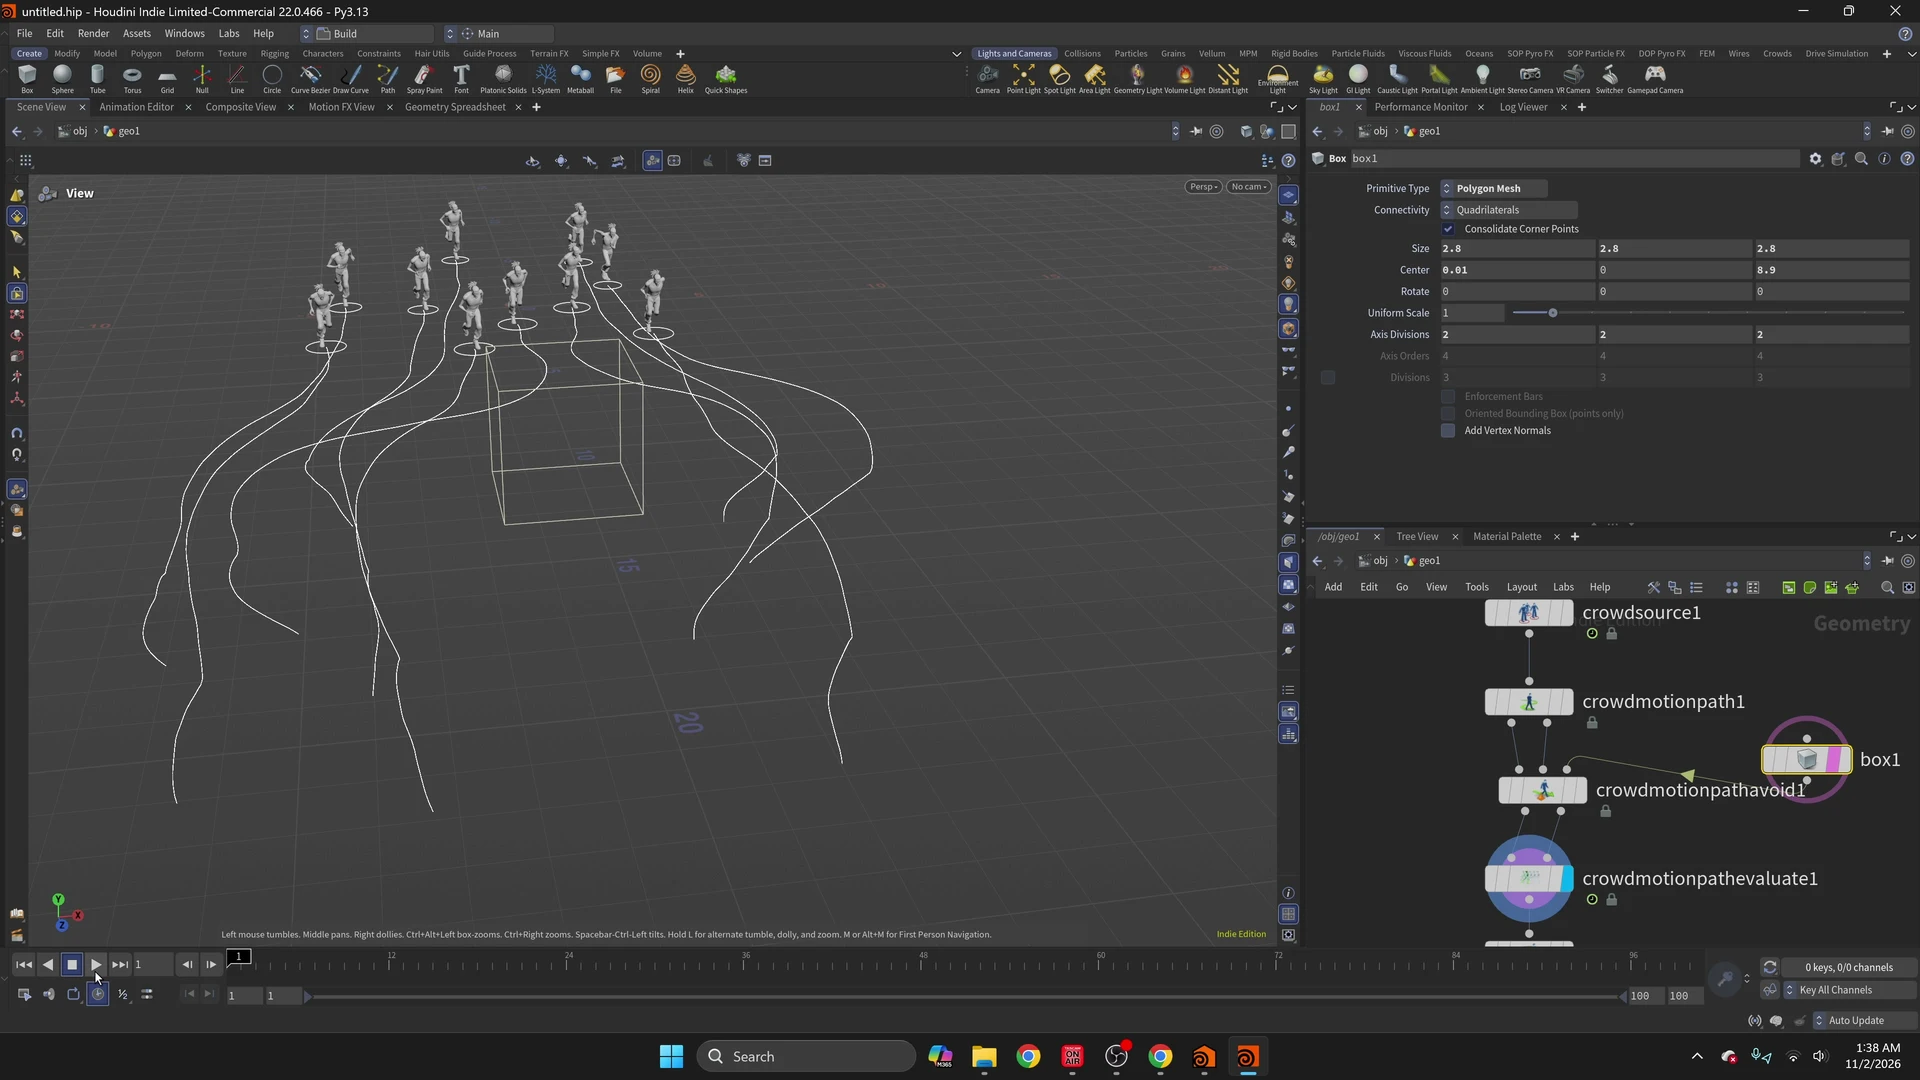
At higher density, one runner still went through the box. I adjusted the obstacle placement, reduced the source count from a 100-agent trial toward 80, and used Blast on one outlier. The visible group field is 36 in that recorded state. Point numbers can change as the scatter changes. Find the offending agent in your own shot instead of entering that number. The saved flipbook’s final head count has not been independently counted.
Play the final result
Merge the unpacked crowd, obstacle geometry and ground grid for the viewport check. Generate a flipbook to review motion. I initially initiated a single-frame render and wondered why the preview was taking so long. The later MPlay recording and separate movie establish what actually completed. The final proof is a textured, 100-frame flipbook.
For a blocking shot, I could keep the four performances and revise the crowd paths downstream. I would still review the end of each clip, the arms passing the torso, and the turn around the obstacle before approving a closer shot. The original Houdini project was unsaved, so the node and parameter examples here are tied to named recording frames. The comparison plates in the video are newly rendered from the saved FBXs.
Try the workflow on your own rig
Try Cascadeur through my affiliate link. Use CGINERD15 for the 15% audience discount confirmed by Cascadeur. Check eligibility and the final price at checkout; the partner confirmation does not specify plan restrictions, renewal coverage, expiry, or whether offers can be combined.
Cascadeur provided complimentary Pro access for this evaluation. I may earn a commission from qualifying purchases through that link. The production observations and opinions are my own. The screenshots and recorded results are checkpoints so you can see where your result diverges from mine.